How to Seamlessly Integrate Calendly into Webflow

Introduction

Let's start by understanding what Calendly and Webflow are. Calendly is an online scheduling tool that allows you to easily set up meetings, appointments, and events with clients or team members. It's user-friendly, and flexible, and helps save time by streamlining the scheduling process. Webflow, on the other hand, is a powerful web design and development platform that enables you to create beautiful, responsive websites without any coding knowledge.

Now that you know what Calendly and Webflow are, let's talk about the benefits of integrating Calendly into Webflow. By bringing these two tools together, you can provide a seamless experience for your website visitors when scheduling appointments or meetings. This integration eliminates the need for users to leave your website, keeping them engaged and improving the overall user experience. Plus, it saves you time and effort by automating the scheduling process and minimizing back-and-forth communication.

But why is seamless integration important? Well, in today's fast-paced digital world, user experience is everything. Ensuring a smooth and uninterrupted experience for your website visitors not only improves their satisfaction but also increases the likelihood of them returning to your site and recommending it to others. In this blog, we'll guide you through the process of integrating Calendly into Webflow, ensuring a seamless experience for both you and your users.

Prerequisites

Before we dive into the integration process, there are a couple of prerequisites you need to take care of. Don't worry; they're simple and straightforward!

Setting up a Calendly account

First, you'll need a Calendly account. Head over to calendly.com and sign up for a free account. This will give you access to the basic features, which are perfect for getting started. If you need more advanced features, Calendly also offers paid plans. Once you've signed up, create an event type, set your availability, and personalize the appearance of your scheduling page. And just like that, you're all set with Calendly!

Creating a Webflow project

Next up, you'll need a Webflow project. If you haven't already, sign up for a free account at webflow.com. With a free account, you can create up to two projects. For more projects or additional features, consider upgrading to a paid plan. Once you're logged in, click the "Create New Project" button on your dashboard. Choose a template or start with a blank canvas, and you're ready to bring your website to life using Webflow's powerful design and development tools.

Now that you've got your Calendly account and Webflow project ready, let's move on to the integration process!

Step-by-Step Guide: Integrating Calendly into Webflow

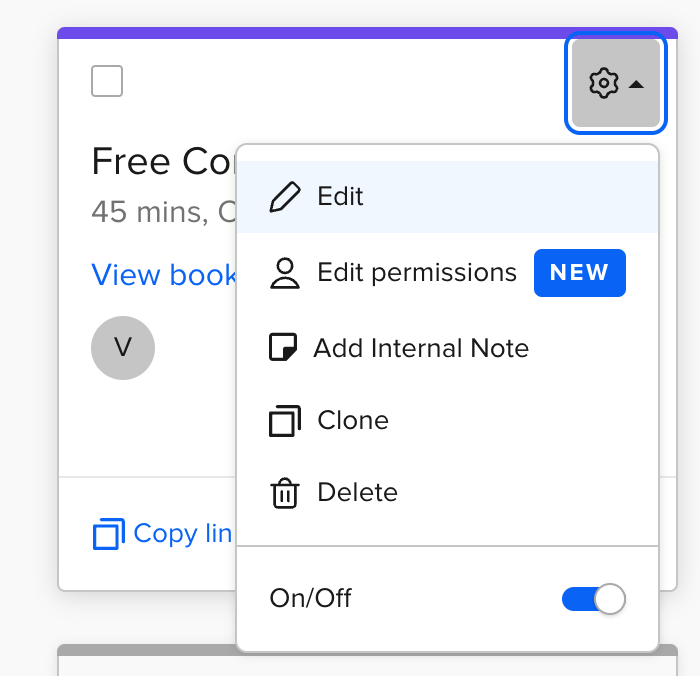
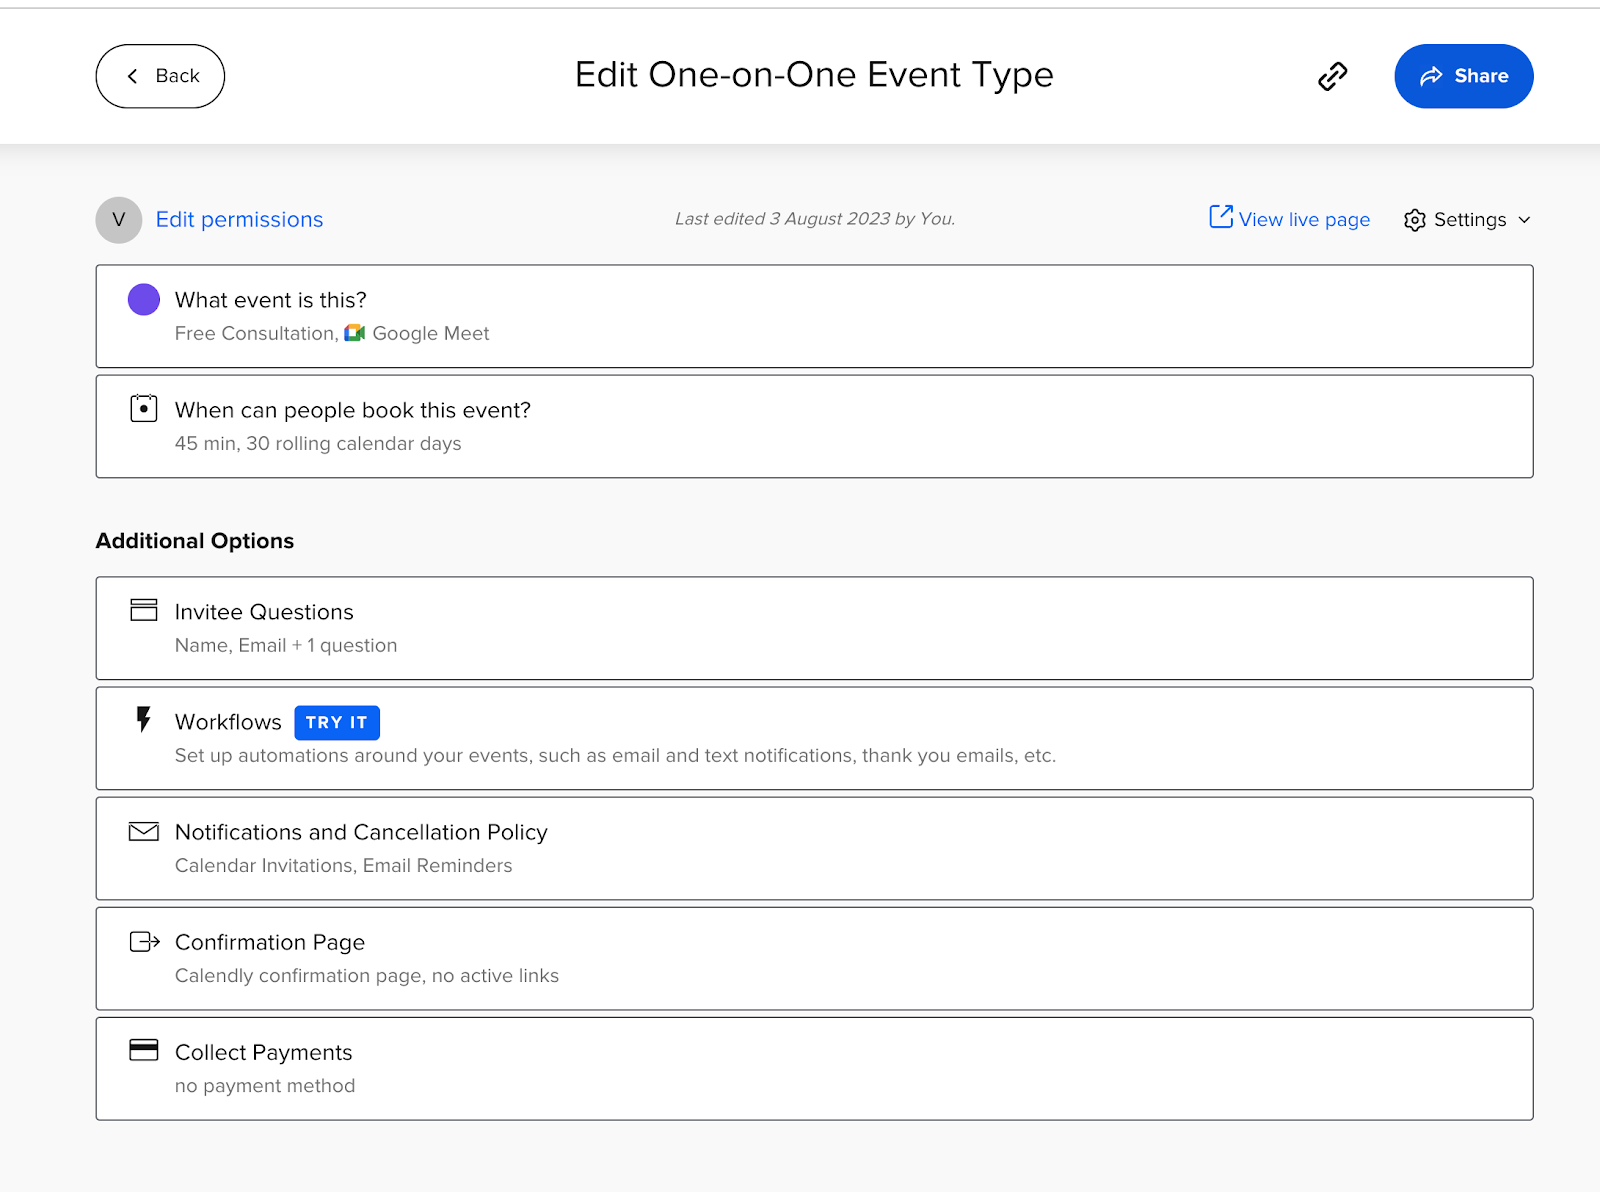
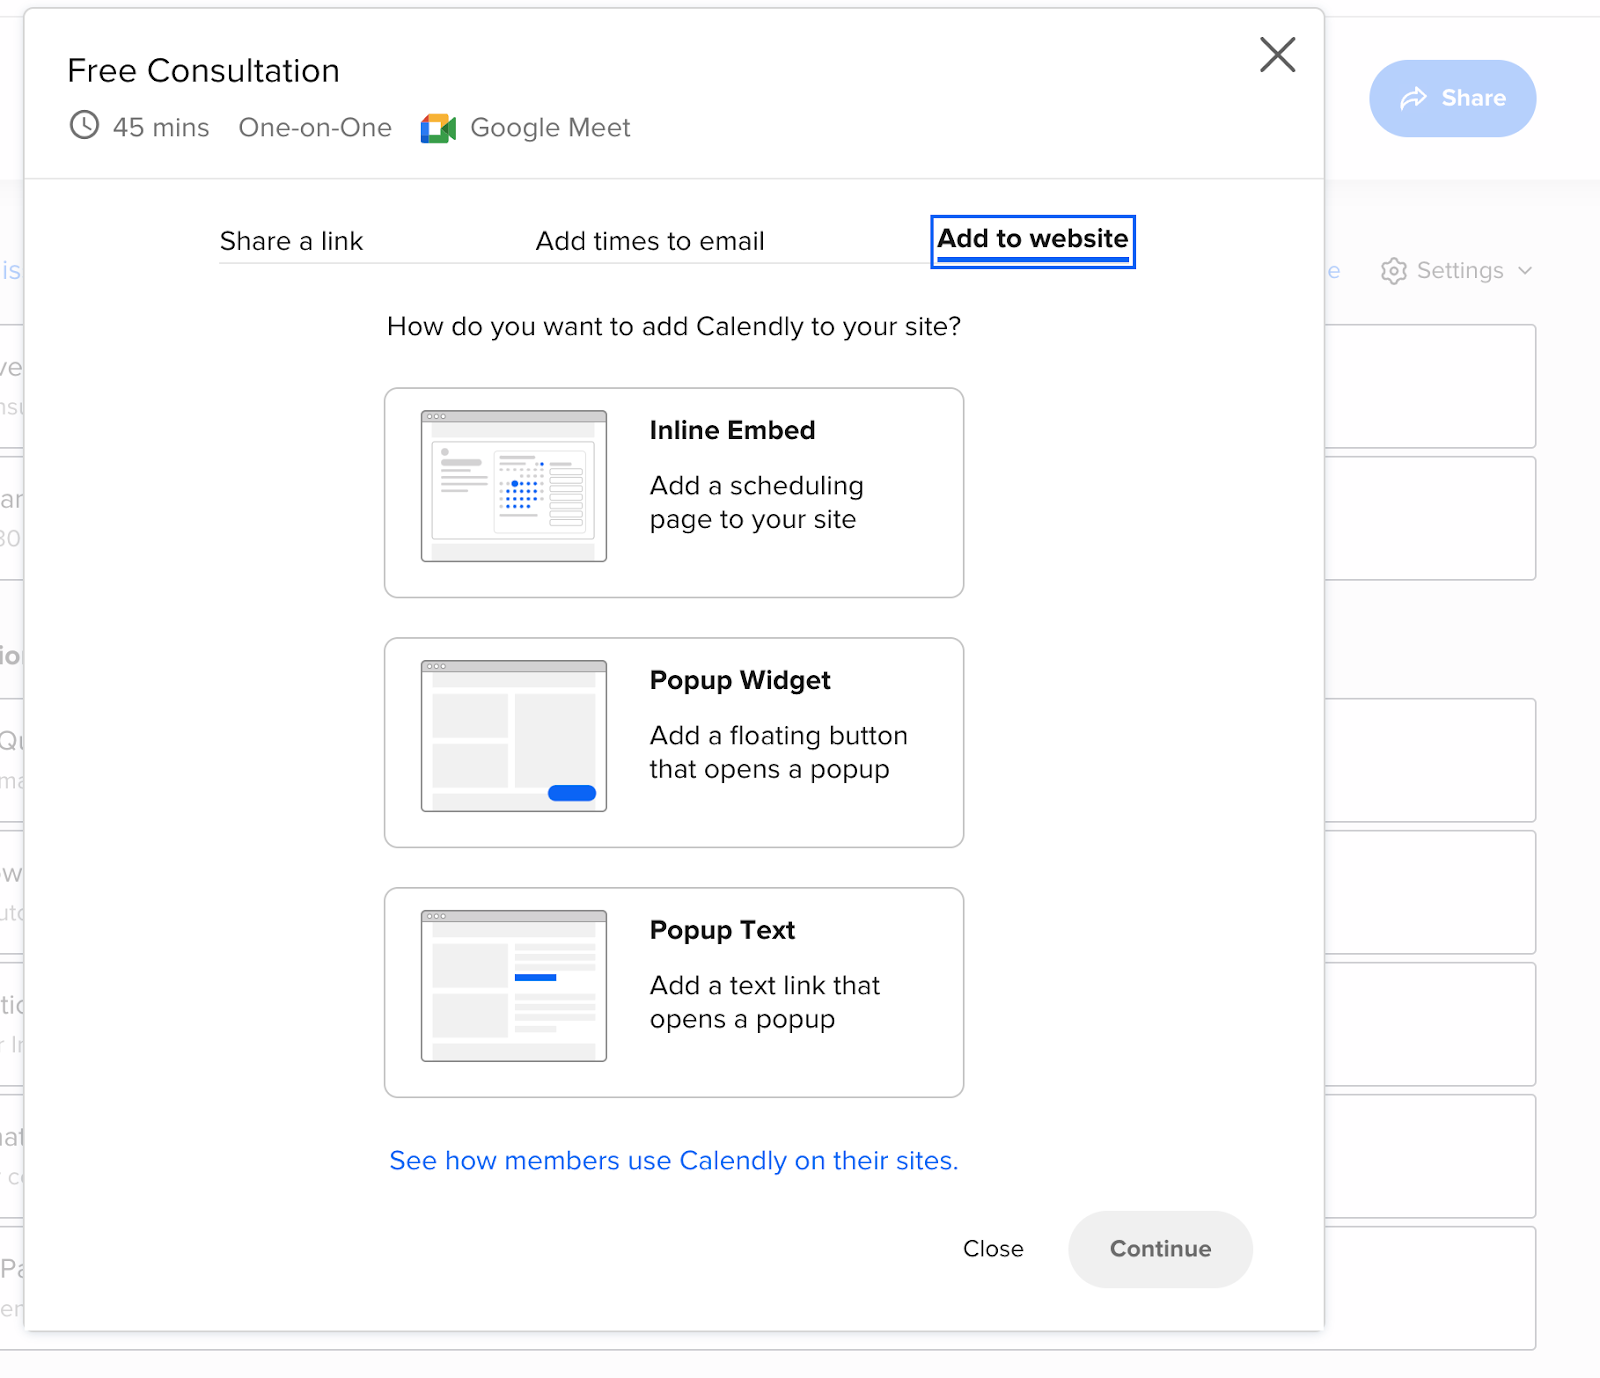
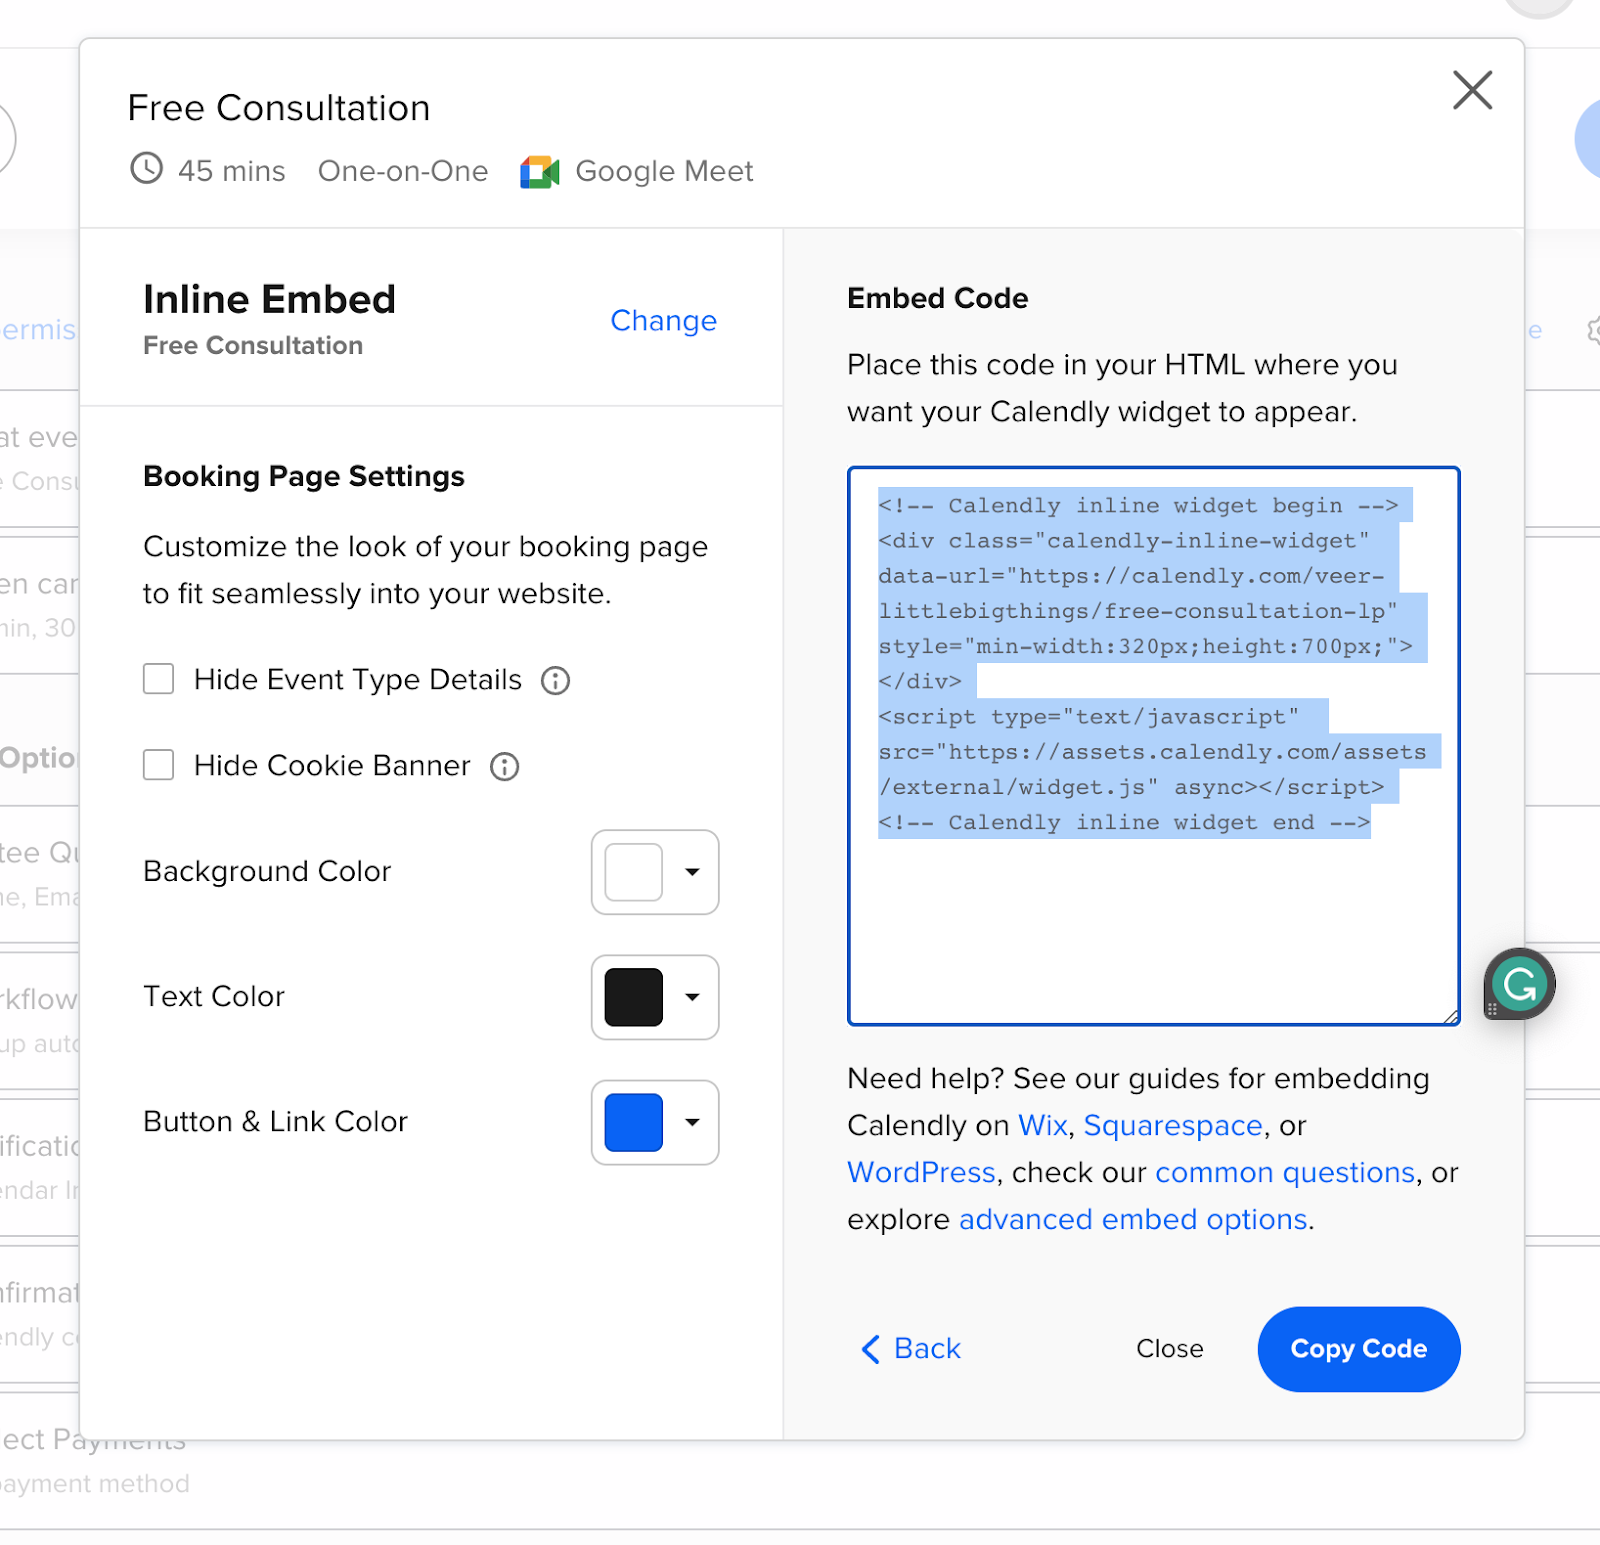
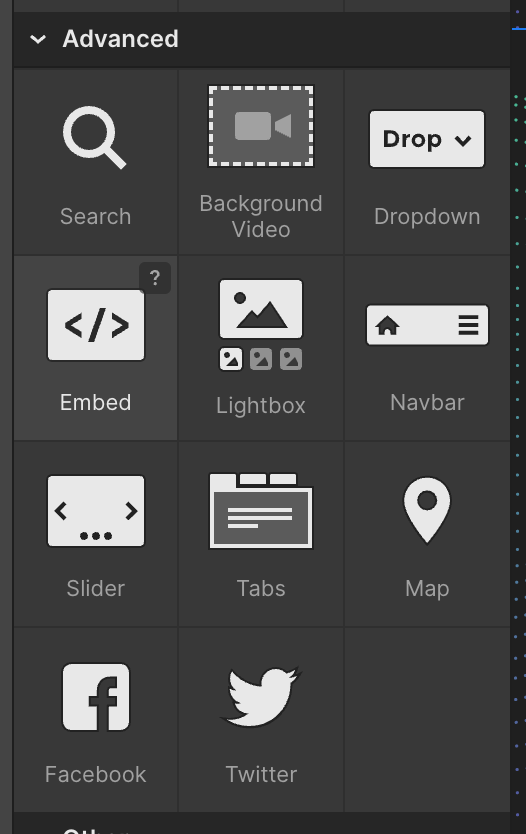
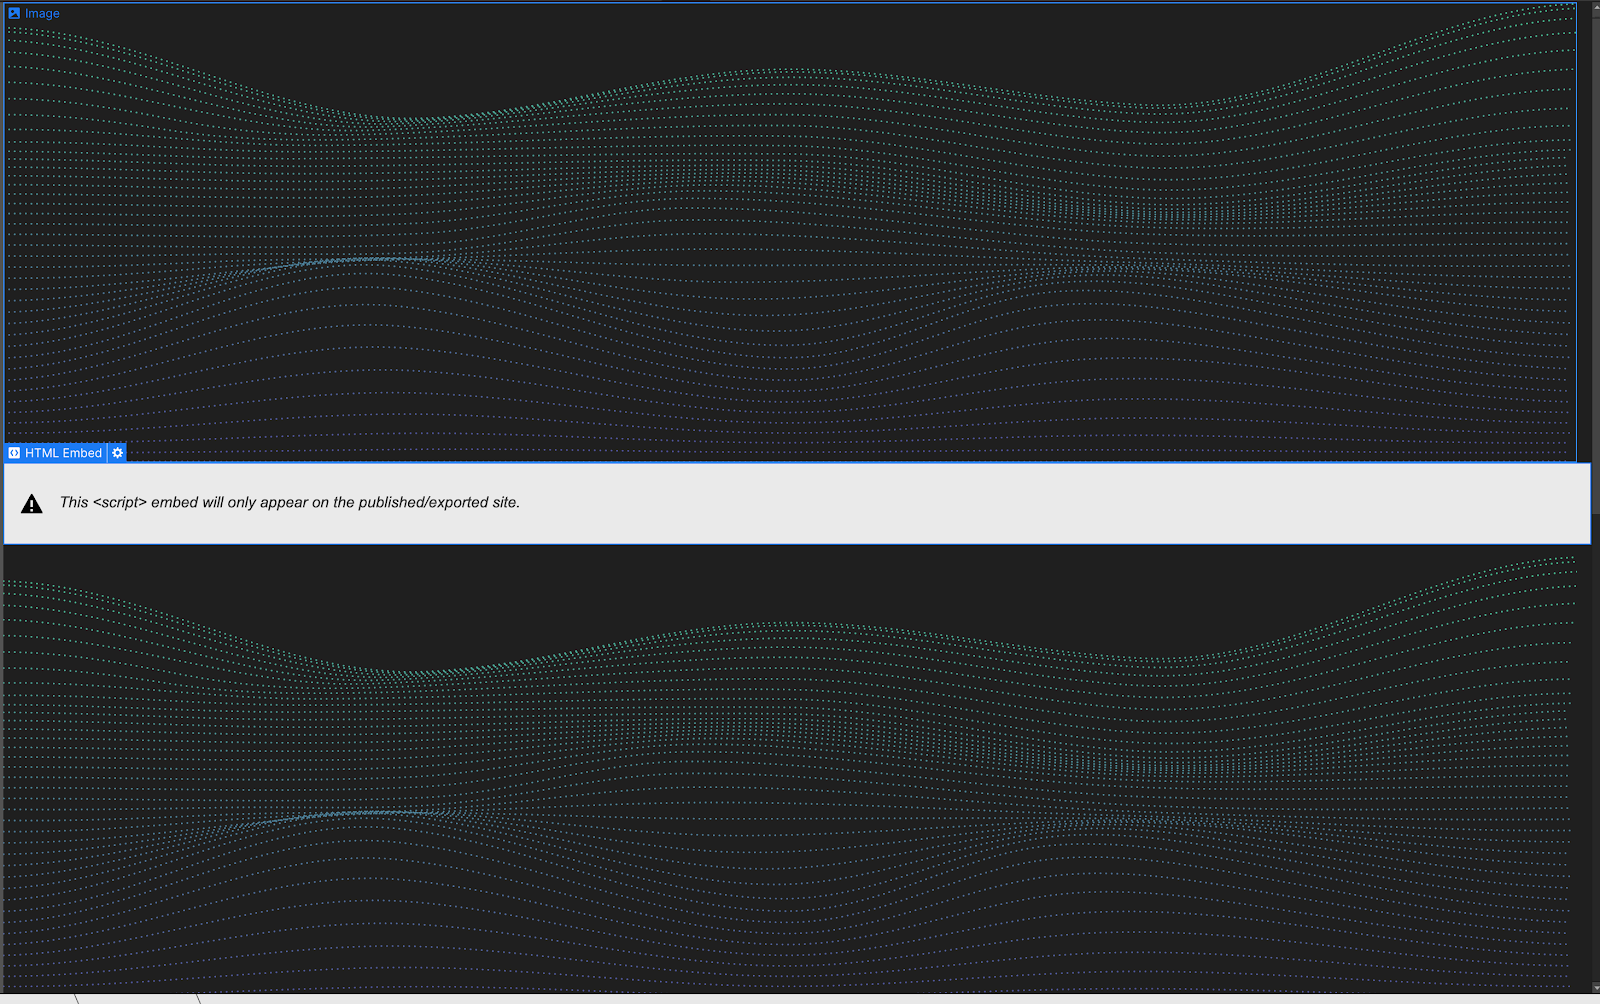
Now that you have your Calendly account and Webflow project ready, let's walk through the process of integrating Calendly into Webflow step by step.

Accessing your Calendly embed code

  1. Logging into Calendly: Start by logging into your Calendly account. If you're not already logged in, head to calendly.com and sign in.
  2. Selecting the event type: From your Calendly dashboard, choose the event type you'd like to integrate with your Webflow site. If you haven't created an event type yet, follow the prompts to do so.
  3. Choosing the embed option and copying the code: Once you've selected the event type, click the "Share" button. In the Share menu, select the "Embed" option. Calendly will generate an embed code for you to copy. Click the "Copy Code" button to copy the code to your clipboard.

Adding the Calendly embed code to Webflow

  1. Navigating to your Webflow project: Open your Webflow project where you'd like to add the Calendly integration. Make sure you're in the Designer view.
  2. Adding an Embed element to your desired location: In Webflow, locate the spot on your website where you want the Calendly widget to appear. Drag and drop an "Embed" element from the "Add Elements" panel to that location.
  3. Pasting the Calendly embed code: With the Embed element selected, click on the "Edit Code" button. A code editor will appear. Paste the Calendly embed code you copied earlier into the editor, then click "Save & Close."
  4. Customizing the appearance and functionality (optional): If you want to further customize the appearance or functionality of the Calendly widget, you can do so within the Calendly dashboard or by editing the embed code directly in Webflow.

Publish your Webflow project

  1. Previewing your Calendly integration: Before you publish your website, it's a good idea to preview the Calendly integration. Click the "Preview" button in the Webflow Designer to see how the Calendly widget looks and functions on your website.
  2. Publishing your website: Once you're satisfied with the appearance and functionality of the Calendly integration, it's time to publish your website. Click the "Publish" button in Webflow, and your Calendly integration will be live for all to see!

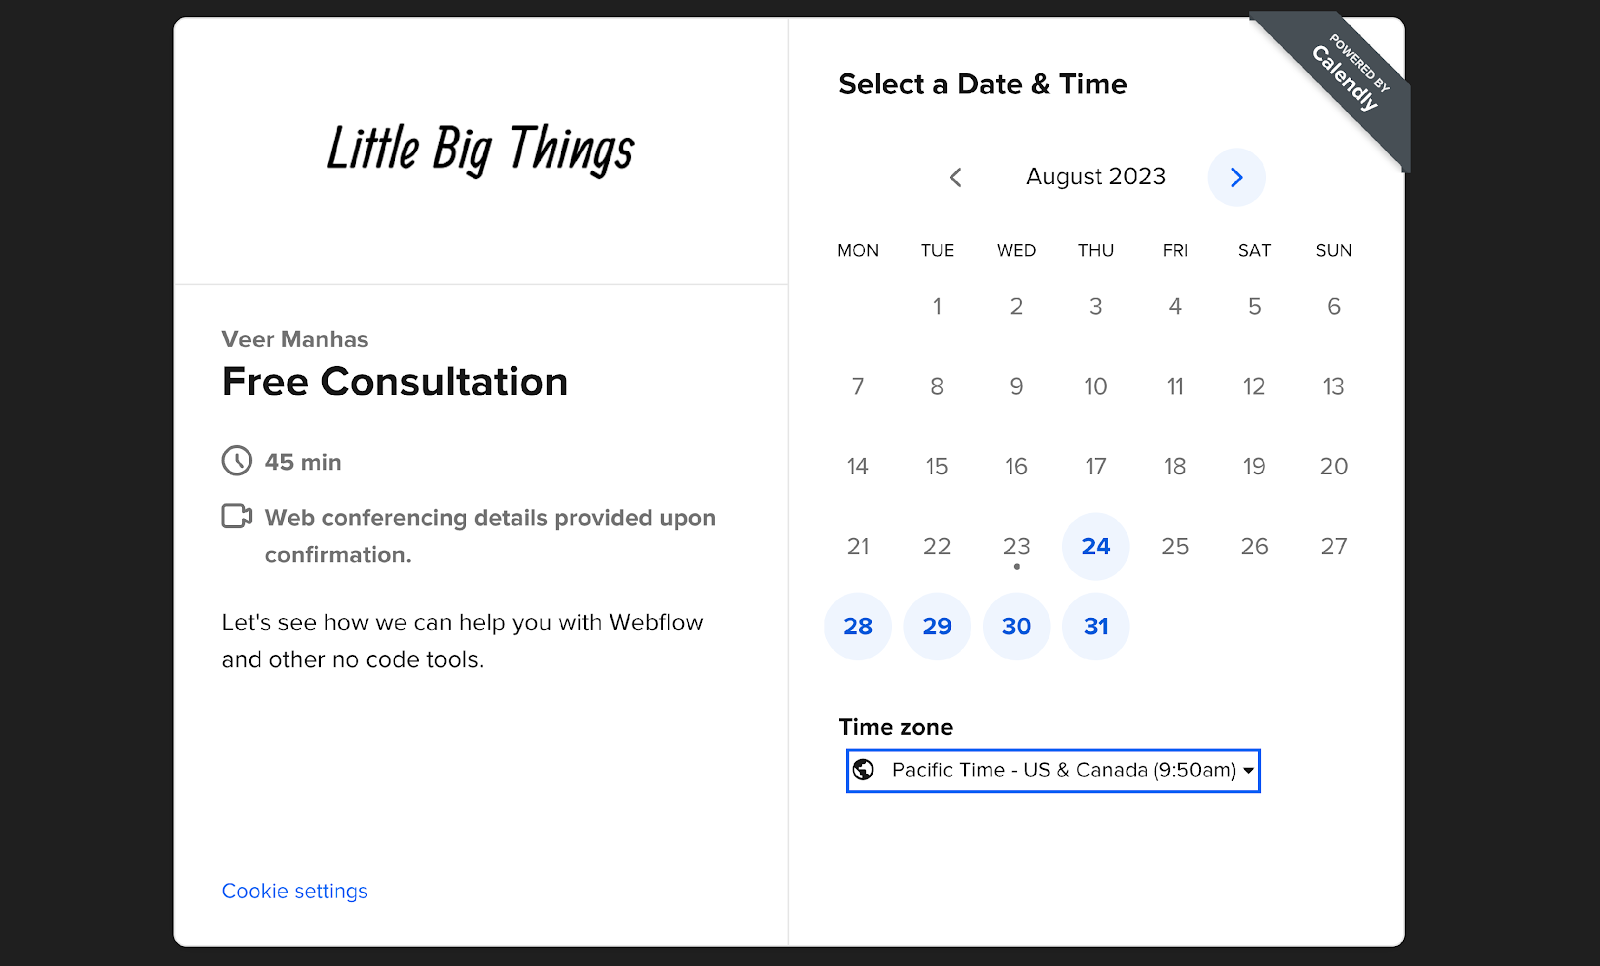
Congratulations! You've successfully integrated Calendly into your Webflow site. Enjoy the benefits of a seamless scheduling experience for your website visitors.

Tips and Tricks for a Seamless Integration

With your Calendly integration up and running, you might be wondering how you can further enhance the experience for your website visitors. Here are some tips and tricks for making your Calendly integration even more seamless and user-friendly.

Customizing Calendly appearance

  1. Adjusting colors and fonts: To make your Calendly widget look more cohesive with your website's design, consider customizing its appearance. Head to your Calendly dashboard, click on the "Event Types" tab, and select the event type you've integrated with your Webflow site. From there, click the "Customize" button to change the colors, fonts, and other visual aspects of the scheduling page.
  2. Incorporating your brand's design elements: For a more consistent look, you can also incorporate your brand's design elements into your Calendly widget. You may need to upgrade to a paid Calendly plan to access some advanced customization features. Be creative and find ways to make the Calendly widget feel like a natural part of your website's design!

Enhancing user experience

  1. Positioning the Calendly widget effectively: Think about the best location on your website for the Calendly widget. You want to make it easy for visitors to find and use. Consider placing it on your contact page, in a sidebar, or as a call-to-action button on your homepage.
  2. Ensuring mobile responsiveness: With more users browsing websites on mobile devices, it's important to ensure that your Calendly widget is mobile-responsive. Test your website on various devices and screen sizes to make sure the widget looks and functions correctly. You can also use Webflow's built-in responsive design tools to fine-tune the appearance and layout of the Calendly widget on different devices.

By following these tips and tricks, you'll be well on your way to creating a seamless and enjoyable scheduling experience for your website visitors. Happy integrating!

Conclusion

Let's take a moment to recap what we've covered. We've walked you through the process of integrating Calendly into Webflow, from setting up your accounts and accessing the embed code to adding the widget to your Webflow project and publishing your website. We've also shared some tips and tricks for customizing the appearance of the Calendly widget and enhancing the user experience on your site.

By integrating Calendly into your Webflow website, you're providing a seamless scheduling experience for your visitors, which can lead to increased engagement, improved customer satisfaction, and ultimately, more conversions. Don't miss out on the benefits of this powerful integration - try it for yourself and see how it can enhance your website's user experience!

Remember, at Lil Big Things, our mission is to empower businesses like yours with high-quality Webflow development and marketing solutions. Feel free to explore our website and learn more about how our expertise can help your business grow. Happy integrating!

Reference links:

https://help.calendly.com/hc/en-us/articles/223147027-Embed-options-overview?_ga=2.108581378.1693982258.1692808545-1874380654.1692808545

https://university.webflow.com/lesson/add-a-calendar-to-your-site-with-calendly

Get even faster page loads.
Learn More
Arrow
Thank you! Your submission has been received!
Oops! Something went wrong while submitting the form.
Lil Big Things is for marketers and founders who don't have tech for their marketing at hand.
Get A Free Consult
Arrow
Veer Manhas
Author

Webflow Partner taking care of your technical woes in marketing from Webflow to data tracking 🚀🚀

You Design, We Webflow. We follow our clients vision and provide limitless Webflow development catering to their creative ideation.

Ready to get started?
Get a free consult